Il tuo carrello

il tuo carrello è vuoto

Sembra che tu non abbia ancora aggiunto nulla al tuo carrello

Today's Deals

1.3mm Black to White Two-Tone Acrylic Sheet (4pcs)
Esaurito
1.3mm Black to White Two-Tone Acrylic Sheet (4pcs)

1.3mm Black to White Two-Tone Acrylic Sheet (4pcs)

Prezzo di vendita
€24,99
Prezzo regolare
€49,99
Negozio veloce
1.3mm Green to White Two-Tone Acrylic Sheet (4pcs)
Esaurito
1.3mm Green to White Two-Tone Acrylic Sheet (4pcs)

1.3mm Green to White Two-Tone Acrylic Sheet (4pcs)

Prezzo di vendita
€24,99
Prezzo regolare
€49,99
Negozio veloce
10 colors Longer engraving machine consumables 0.21mm

10 colors Longer engraving machine consumables 0.21mm

Prezzo
Da €19,99
Negozio veloce
10W Laser Module for Longer Ray5

10W Laser Module for Longer Ray5

Prezzo di vendita
€219,99
Prezzo regolare
€299,99
175 PCS DIY Engraving Material

175 PCS DIY Engraving Material

Prezzo di vendita
€74,99
Prezzo regolare
€99,99
20W Laser Module for Longer Ray5

20W Laser Module for Longer Ray5

Prezzo di vendita
€359,99
Prezzo regolare
€459,99
30W Laser Module for Longer Ray5

30W Laser Module for Longer Ray5

Prezzo di vendita
€439,99
Prezzo regolare
€569,99

Prodotti

Today's Deals

Lingua

IT

Paese/regione

Paese

EUR

Account

Account

Login

Carrello

Menù
Account
Italiano (IT)
Germania (EUR €)
LONGER Research: Ray5 20W Medical Device Laser Marking

As the back-to-school season approaches, whether you're a student majoring in art and design, a campus DIY enthusiast, or a young entrepreneur about to launch a small business, a suitable laser engraver could become a powerful tool for your learning, creativity, and hands-on practice. With a wide range of laser engravers on the market, how do you choose the one that suits you best? This article provides a comprehensive guide based on key factors and offers exclusive back-to-school deals to help you purchase your ideal device at a more affordable price.

Laser Module Type Based on Material
Different laser modules are suitable for engraving different materials. If you mainly work with wood, dark acrylic, leather, fabric, leaves, or stone, a blue laser module is an excellent choice. Blue lasers can accurately engrave intricate patterns and textures on these surfaces, making them ideal for wooden crafts or decorative leatherwork.

If you're working with metals like gold, silver, copper, iron, or aluminum, an infrared (IR) laser module is better suited. These high-energy lasers are capable of precise marking and engraving on metal surfaces.


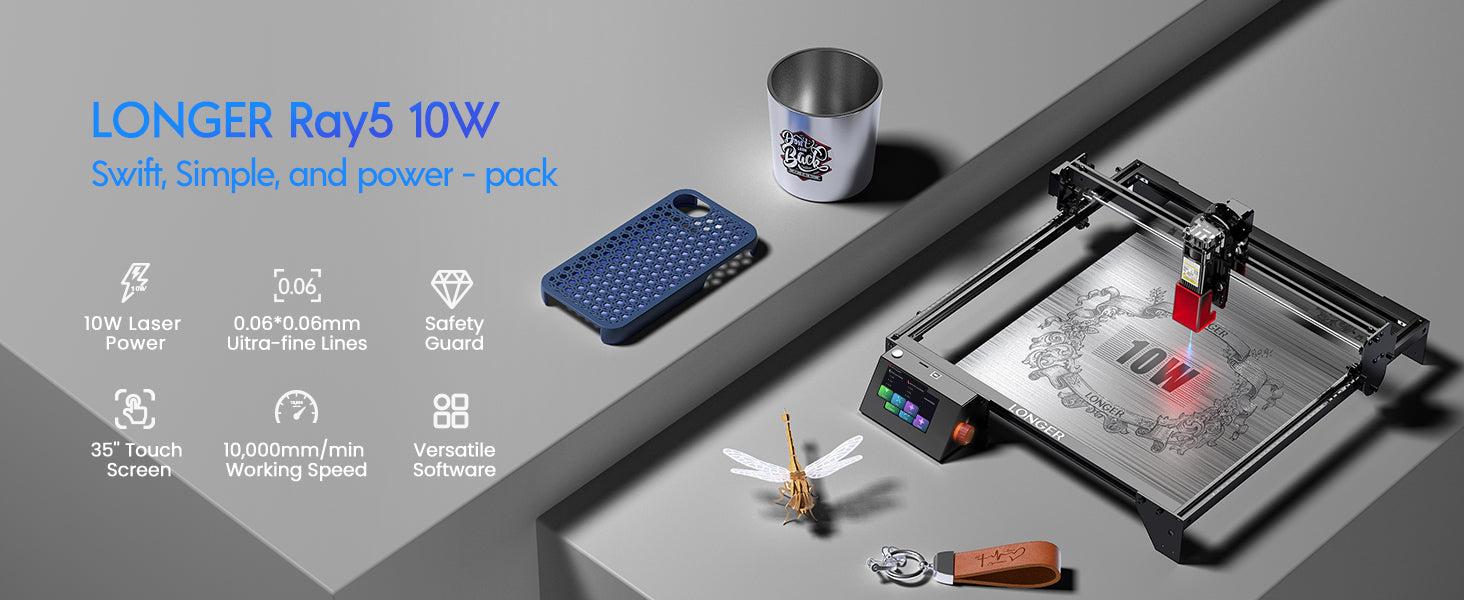
Higher power isn't always better. For beginners working mainly with wood and acrylic, a mid-range power level, such as 10W, is typically sufficient. A 10W blue laser can achieve detailed engraving and cut 8mm basswood in one pass, significantly boosting efficiency.


Entry-Level & Light Projects (thin wood, paper, leather, some acrylic): 
Recommended Power: 6W - 10W 
Suggested Models: Nano 6W, RAY5 10W 
Features: Affordable, compact, desktop-friendly, easy to learn. Great for hobbyists and small handmade projects.

Scenario-Based Model Selection

Usage scenarios also influence your choice of engraver. For home use and large-format creations, an XY-axis motion engraver is ideal. The laser head moves over a fixed work area and is great for large wood panels, full leather sheets, and more.

For small-batch studio production like phone cases, metal tags, and electronics, galvo-style engravers offer much faster engraving. These machines use mirrors to direct the laser beam without moving the workpiece. However, galvo engravers are generally more expensive.


LONGER's laser engravers use optimized hardware and software algorithms to break the traditional XY-axis speed barrier, reaching up to 36,000mm/min. This enables large-scale engraving with near-galvo speeds at a much better price-performance ratio.


Professional & High-Efficiency Use (large format, dense materials, fast cutting): 
Recommended Power: 40W+ 
Suggested Models: B1 40W series 
Features: Powerful performance, faster cutting speeds, suitable for heavy-duty tasks and studio production.


Focus on Key Specs: Balancing Precision, Speed, and Power
Precision Affects Quality Engraving precision directly impacts the detail and quality of finished products. For studios or creators with high standards, invest in higher precision models within your budget.


Engraving speed is also crucial for productivity and profitability. Faster engraving means more output in less time—essential for batch orders and customer satisfaction. Different machines offer different speed and precision balances. Choose based on your production needs and budget to ensure both quality and efficiency.


LONGER uses compressed laser spot technology that narrows the beam to just 0.08*0.1mm, enabling ultra-fine detail like hair textures and crisp lines.


Intermediate & Mainstream Use (thicker wood, dark acrylic, fine engraving, small batch production): 
Recommended Power: 20W - 30W 
Suggested Models: Ray5 20W series, Nano Pro 12W 
Features: Excellent balance of speed, accuracy, and material versatility. Ideal for makerspaces, design students, and small studios.

Consider Safety and User-Friendliness

Safety First As laser engravers emit radiation, choose machines certified as Class 1 Laser Products. These comply with strict safety standards and ensure user protection.
Look for features like:


Enclosed shielding to block light and smoke
Auto power-off in case of errors
Emergency stop buttons
Alarms for abnormal operations
Some models also include protective shields, multiple sensors, exhaust fans, child locks, and more.


Ease of Use Assembly-free machines greatly improve the user experience. Some engravers require complex setup, which can discourage beginners. Choose plug-and-play models when possible. LONGER emphasizes ease of use with pre-calibrated, ready-to-use machines. Just unbox, plug in, connect to software, and start engraving—no tedious assembly needed.

Product Recommendations: Find Your Perfect Match

Ray5 Series (Best Value)
Ray5 10W: Affordable entry point. Great for learning the basics.
Ray5 20W (Star Product): Best price-to-performance balance. 

*Ray5 20W Pro Max (Machine + Honeycomb Panel + Air Pump + Roller): Covers all essentials. 
Honeycomb panel protects base, improves airflow. 
Air pump clears smoke for better clarity. Roller enables cylindrical engraving. 

Back-to-school deal: $499.99 (was $869.99), save $370! 

*RAY5 20W Extension Pack (+ Extension Rods): Increases Y-axis space for larger material. Deal: $839.99.   

B1 Series (Professional)
B1 40W: High power for serious work. 

*B1 40W Pro Max (Machine + Honeycomb + Roller + Camera + Enclosure): Ultimate setup. 
Camera allows precise positioning; enclosure improves safety. 
Deal: $1099.99 

*B1 40W IR + Material Pack (+ IR Head + Material Kit)
Infrared laser head for metal marking, material kit for instant use. Deal: $1289.99

Nano Series (Desktop Precision)
Nano Pro 12W: Ideal for jewelry, electronics, and detailed work. 

*Nano Pro Max (Machine + Chuck + Extension Rod)
Chuck enables rotary engraving; rods extend X-axis. Deal: $989.99

Accessory Guide: Upgrade Smart for Better Results

Honeycomb Panel (Highly Recommended!): Protects base, avoids reflection, improves results. 
Air Assist (Highly Recommended!): Removes smoke/debris during engraving, enhances line clarity. 
Roller: Enables cylindrical engraving (cups, tubes, etc.) 
Extension Rods: Expand engraving area. 
Camera: (B1 Series) Allows precise design placement. 
IR Laser Head: For metal/ceramic marking. 

Smoke Purifier: Improves air quality, protects health.


Back-to-School Bundle Tip: Accessories bought separately are often pricier. Back-to-school bundles offer 25%-42% OFF. Choose a package that includes key items like a honeycomb panel and air pump for best value. For example, the Ray5 20W Pro Max's accessory value exceeds the bundle discount.


This back-to-school season, by evaluating your needs, focusing on key specs, prioritizing safety and ease of use, and grabbing the best bundle deals, you can find a high-value laser engraver that supports your learning, creativity, and entrepreneurship. Take action now and start your laser engraving journey today!

By Academy | April 30, 2025
LONGER Research: Elevating Promotional Product Design with Laser B1 40W

As the back-to-school season approaches, whether you're a student majoring in art and design, a campus DIY enthusiast, or a young entrepreneur about to launch a small business, a suitable laser engraver could become a powerful tool for your learning, creativity, and hands-on practice. With a wide range of laser engravers on the market, how do you choose the one that suits you best? This article provides a comprehensive guide based on key factors and offers exclusive back-to-school deals to help you purchase your ideal device at a more affordable price.

Laser Module Type Based on Material
Different laser modules are suitable for engraving different materials. If you mainly work with wood, dark acrylic, leather, fabric, leaves, or stone, a blue laser module is an excellent choice. Blue lasers can accurately engrave intricate patterns and textures on these surfaces, making them ideal for wooden crafts or decorative leatherwork.

If you're working with metals like gold, silver, copper, iron, or aluminum, an infrared (IR) laser module is better suited. These high-energy lasers are capable of precise marking and engraving on metal surfaces.


Higher power isn't always better. For beginners working mainly with wood and acrylic, a mid-range power level, such as 10W, is typically sufficient. A 10W blue laser can achieve detailed engraving and cut 8mm basswood in one pass, significantly boosting efficiency.


Entry-Level & Light Projects (thin wood, paper, leather, some acrylic): 
Recommended Power: 6W - 10W 
Suggested Models: Nano 6W, RAY5 10W 
Features: Affordable, compact, desktop-friendly, easy to learn. Great for hobbyists and small handmade projects.

Scenario-Based Model Selection

Usage scenarios also influence your choice of engraver. For home use and large-format creations, an XY-axis motion engraver is ideal. The laser head moves over a fixed work area and is great for large wood panels, full leather sheets, and more.

For small-batch studio production like phone cases, metal tags, and electronics, galvo-style engravers offer much faster engraving. These machines use mirrors to direct the laser beam without moving the workpiece. However, galvo engravers are generally more expensive.


LONGER's laser engravers use optimized hardware and software algorithms to break the traditional XY-axis speed barrier, reaching up to 36,000mm/min. This enables large-scale engraving with near-galvo speeds at a much better price-performance ratio.


Professional & High-Efficiency Use (large format, dense materials, fast cutting): 
Recommended Power: 40W+ 
Suggested Models: B1 40W series 
Features: Powerful performance, faster cutting speeds, suitable for heavy-duty tasks and studio production.


Focus on Key Specs: Balancing Precision, Speed, and Power
Precision Affects Quality Engraving precision directly impacts the detail and quality of finished products. For studios or creators with high standards, invest in higher precision models within your budget.


Engraving speed is also crucial for productivity and profitability. Faster engraving means more output in less time—essential for batch orders and customer satisfaction. Different machines offer different speed and precision balances. Choose based on your production needs and budget to ensure both quality and efficiency.


LONGER uses compressed laser spot technology that narrows the beam to just 0.08*0.1mm, enabling ultra-fine detail like hair textures and crisp lines.


Intermediate & Mainstream Use (thicker wood, dark acrylic, fine engraving, small batch production): 
Recommended Power: 20W - 30W 
Suggested Models: Ray5 20W series, Nano Pro 12W 
Features: Excellent balance of speed, accuracy, and material versatility. Ideal for makerspaces, design students, and small studios.

Consider Safety and User-Friendliness

Safety First As laser engravers emit radiation, choose machines certified as Class 1 Laser Products. These comply with strict safety standards and ensure user protection.
Look for features like:


Enclosed shielding to block light and smoke
Auto power-off in case of errors
Emergency stop buttons
Alarms for abnormal operations
Some models also include protective shields, multiple sensors, exhaust fans, child locks, and more.


Ease of Use Assembly-free machines greatly improve the user experience. Some engravers require complex setup, which can discourage beginners. Choose plug-and-play models when possible. LONGER emphasizes ease of use with pre-calibrated, ready-to-use machines. Just unbox, plug in, connect to software, and start engraving—no tedious assembly needed.

Product Recommendations: Find Your Perfect Match

Ray5 Series (Best Value)
Ray5 10W: Affordable entry point. Great for learning the basics.
Ray5 20W (Star Product): Best price-to-performance balance. 

*Ray5 20W Pro Max (Machine + Honeycomb Panel + Air Pump + Roller): Covers all essentials. 
Honeycomb panel protects base, improves airflow. 
Air pump clears smoke for better clarity. Roller enables cylindrical engraving. 

Back-to-school deal: $499.99 (was $869.99), save $370! 

*RAY5 20W Extension Pack (+ Extension Rods): Increases Y-axis space for larger material. Deal: $839.99.   

B1 Series (Professional)
B1 40W: High power for serious work. 

*B1 40W Pro Max (Machine + Honeycomb + Roller + Camera + Enclosure): Ultimate setup. 
Camera allows precise positioning; enclosure improves safety. 
Deal: $1099.99 

*B1 40W IR + Material Pack (+ IR Head + Material Kit)
Infrared laser head for metal marking, material kit for instant use. Deal: $1289.99

Nano Series (Desktop Precision)
Nano Pro 12W: Ideal for jewelry, electronics, and detailed work. 

*Nano Pro Max (Machine + Chuck + Extension Rod)
Chuck enables rotary engraving; rods extend X-axis. Deal: $989.99

Accessory Guide: Upgrade Smart for Better Results

Honeycomb Panel (Highly Recommended!): Protects base, avoids reflection, improves results. 
Air Assist (Highly Recommended!): Removes smoke/debris during engraving, enhances line clarity. 
Roller: Enables cylindrical engraving (cups, tubes, etc.) 
Extension Rods: Expand engraving area. 
Camera: (B1 Series) Allows precise design placement. 
IR Laser Head: For metal/ceramic marking. 

Smoke Purifier: Improves air quality, protects health.


Back-to-School Bundle Tip: Accessories bought separately are often pricier. Back-to-school bundles offer 25%-42% OFF. Choose a package that includes key items like a honeycomb panel and air pump for best value. For example, the Ray5 20W Pro Max's accessory value exceeds the bundle discount.


This back-to-school season, by evaluating your needs, focusing on key specs, prioritizing safety and ease of use, and grabbing the best bundle deals, you can find a high-value laser engraver that supports your learning, creativity, and entrepreneurship. Take action now and start your laser engraving journey today!

By Academy | April 30, 2025
LONGER Academy: Top Diode Laser Safety and Usage Guide: Longer Ray5 10W Review

Introduction
Longer Ray5 20W is a powerful laser engraving machine, but encountering technical challenges with your Ray5 20W Laser Cutter can be frustrating and disruptive to your workflow. Understanding and addressing common issues promptly can help maintain optimal performance and productivity. In this guide, we will explore some of the most frequently encountered problems with the Ray5 20W Laser Cutter and provide effective solutions to resolve them. Whether you're facing issues with cutting precision, engraving depth, or software connectivity, we've got you covered. Let's dive in and troubleshoot these issues together to ensure smooth operation and consistent results with your Ray5 20W Laser Cutter.

Common Laser Cutting Issues and Solutions


Verify Connections:


Confirm secure and proper attachment of all cables and connections.
Regularly update laser cutting software and firmware for bug fixes and enhancements.
Reach out to LONGER's customer service: support@longer.net for assistance with persistent software issues or error messages.

Variations in Cutting Power or Depth:


Ensure correct laser focus settings to prevent uneven cutting depths.
Check for flaws or warping on the material's surface and secure it properly to avoid movement during cutting.
Adjust laser power and speed settings according to the material being cut.

Cut Alignment Problems:


Calibrate the laser cutting equipment accurately to avoid misalignment.
Inspect the X and Y axes for debris or loose parts that may affect cutting alignment.
Position the material correctly on the cutting bed and use alignment markers or guides for precise cuts.

Conclusion


By addressing these common issues effectively, you can ensure smooth operation and achieve high-quality results with your LONGER Laser Cutter. Keep these troubleshooting tips in mind to optimize your cutting process and minimize downtime.


Ray5 20W Laser Cutting Machine offers numerous advantages, making it a preferred choice for various applications. It boasts rapid task completion and high production efficiency, thanks to its quick engraving speeds, enhancing productivity and meeting deadlines effectively. Additionally, its material flexibility allows it to adapt to a wide range of materials, ensuring consistent and precise cutting results regardless of material hardness. Designed for ease of use, the Ray5 20W Laser Cutter offers straightforward operation via computer control, minimizing operational errors and enabling users of all skill levels to achieve professional-grade results with confidence.


In addition to its performance advantages, the Ray5 20W Laser Cutter also boasts environmental benefits. Utilizing laser technology, it minimizes environmental impact by conserving energy, contributing to sustainability and cost savings. Furthermore, its non-contact processing method reduces the risk of faulty products and tool wear, ensuring precision and quality while extending cutting tool lifespan. By eliminating physical contact with the material surface, the Ray5 20W Laser Cutter enhances efficiency, reduces waste, and promotes environmental sustainability.

By Academy | March 5, 2025
LONGER RAY5 Newest 20W vs. 10W vs. 5W, What's the Differences? Which One to Buy?

If you want to correctly engrave practically anything, you will need a laser engraver. This is because lasers are extremely precise. Because they sell the RAY5 5W and RAY5 10W engravers, the people at LONGER are a fantastic place to begin. The beam's size, power, and focal length are the key distinctions between them; nonetheless, they can engrave a significant amount of material.


If you are looking for a tool to engrave your selected object, then you should choose the model that is most suitable for your needs. Well, worry not, as we are here to tell you about the three basic types of laser engraving, their differences, and a guide to choose which one suits you according to your need. Without further ado, let's dive right in.

What Is Laser Power?

Before we learn about the three types of laser powers, let's just investigate what laser power is. The strength of the laser is what determines how much energy is taken up by the worksheet. The basic rule is that when the laser power is increased, the bend angle grows as well, reaches a peak, and then begins to fall again as the laser power is increased even further.


The higher the laser power, the more heat is absorbed, which results in a higher peak temperature and, therefore, a more incredible amount of plastic deformation at the scanned surface. This causes the bend angle to increase. After reaching its maximum, the bend angle begins to fall because of an increase in laser power.


This is primarily the result of two factors. First, the melting takes place in the region that is being irradiated at higher power, and the heat energy that is being applied is used up in the phase transformation rather than in the bending of the material. Second, when the power is increased, the peak temperature of the surface of the bottom of the vessel likewise increases.


This results in a reduction in the difference between the plastic deformation at the top surface and the bottom surface, which in turn leads to a reduction in the bend angle at greater power.


In terms of optical laser power, the vast majority of the most popular laser engravers on the market now fit into only two primary categories, namely the 5W and 10W optical power. The modules in the first category each contain a single laser diode. In contrast, the 10W modules contain ingenious optics that combine laser light from two different laser diode sources, resulting in output power that is twice as strong as that of the lower-powered modules.

What Exactly Does The "W" Stand For?

Wattage is one of the most significant aspects to consider when discussing laser cutters. It is something that you will need to specify when you first purchase the machine, and it is the factor that affects the final cutting power and speed of your project.


When the wattage rating is increased, the flow of energy also increases. When it comes to laser cutters, having a 20W laser rather than a 5W laser will enable energy to transfer at a substantially faster rate.


You can see a sequence of lasers inside the head of a LONGER RAY 5 if you crack it apart and look at the laser inside of it. However, we strongly advise against doing this. The head of the 20W laser is made up of four 5W lasers, all of which are pointed in the same direction and concentrated through the head of the laser.


Why? The purpose of this is to generate more power and more energy from a single laser beam.

Differences Between LONGER RAY 5  5W Vs. 10W Vs. 20W

The 5W, 10W, and 20W LONGER RAY 5 all share quite a few characteristics in common with one another. On the other hand, there are a comparable number of differences. Let's focus on what differentiates these machines in a series of head-to-head comparisons so that you can make the most informed decision possible about which one to purchase.

Power Of The Laser Head

Before we go any further, there is something that needs to be clarified: although the laser head is the only difference between the two, it has a significant impact on the operation of your LONGER RAY 5 laser engraver, and we will go over those differences in depth here.


Regardless of which wattage option you go with, the LONGER RAY 5 will provide you with the same framework, sensors, and attachments to use. The laser head is the only component that is different.


The LONGER RAY 5 staff refers to it as a "plug-and-play module" in their explanation. You only need two cables and ten minutes of your time to upgrade from a 5W or 10W laser cutter to a 20W model, which gives you more cutting power.


Variations in Laser Power Depend on Which Laser Head You Use and the Different Materials You Can Cut. You can improve the power of your 5W or 10W laser by purchasing a 20W module to add to it.


To put it another way, if you want a 20W, you have the option of either purchasing one specifically designed for that purpose. The only choice available to you if you want a 5W or 10W is to purchase the machine in its current state.


The benefits are significant even though the adjustment is rather straightforward. The next sections are all about the difference that the simple head swap makes.

Quickness Of Project Completion

The exact amount of time it will take to finish the project is contingent on a few different factors:

  • Quickness of the route
  • Precision in cutting depth, selection of materials, and complexity in design.
  • The depth of the etching or cut.

The remaining three of these five parameters are not dependent on your laser cutter in any way. The speed with which your laser cutter completes your job is solely dependent on the routing speed and cutting speed settings.


In this competition, the speeds of the various routes do not differ from one another. The routing speed of the 5W, 10W, and 20W is all 10000mm/min, which is far quicker than the previous generations.


Where do we stand with the cutting depth now? Here is where you'll see a significant deviation from the norm. A laser with 10W of power can cut nearly exactly twice as deep as a laser with 5W of power. When compared to the 10W, the 20W has twice the cutting depth.

This indicates that there is a theoretical difference in cutting depth that is equivalent to four times greater when going from 5W to 20W.

LONGER RAY 5 states that the difference might be very different depending on the material that is used:


When it comes to the amount of time, it will take to accomplish a project. A 20W laser cutter will get the job done the quickest, followed by a 10W laser cutter, and finally, a 5W RAY laser cutter will be the slowest.

Space For Making Cuts and Working Area LONGER RAY 5

While the chassis of each LONGER RAY 5 is the same, the cutting areas of the various configurations are also quite comparable. The LONGER RAY 5  5W and the LONGER RAY 5 10W lasers offer precisely the same cutting area, measuring 400x400mm (15.75×15.75inch).


Although the laser head on the 20W is significantly larger than that found on the 10W, the cutting area is marginally reduced. The cutting area for a 20-watt laser is 375×375mm (14.76×14.76 inch).


Although the difference isn't huge, it's nevertheless significant enough to indicate that the 5W and 10W laser cutters have a little advantage in this category.

Alternatives To Materials(Cutting Capability)

One further aspect of the topic that is connected to laser power is the many kinds of materials that can be worked with. While attempting to engrave or cut certain materials, significantly greater force and forcefulness are required.


You can work with a greater selection of materials when you have a 20W. You can also work with more substantial materials, which opens even more possibilities for the kinds of projects you can develop.


The Ray5 20W comes equipped with a powerful laser module with a 20W output. Also, this machine features the most recent generation of laser enhancement technology, which increases its capacity for cutting. It can cut through 0.002 inches (0.05 mm) of stainless steel, as well as 0.59 inches (15 mm) of pine wood and 0.31 inches (8 mm) of acrylic in a single pass.


Because of recent advancements in compressed laser technology, the laser spot may now be as small as 0.08*0.1mm2, making it possible to engrave artwork with thinner lines, clearer texture, and more attractive details. And the air-assisted interface is reserved, which allows for a wide variety of air pumps to be easily matched up with more hygienic surfaces.


While utilizing the 5W cutter, metal, ceramic, and stone become a great deal more challenging to work with, and in all honesty, the 5W power setting is more commonly used for engraving than it is for cutting. When utilizing a 5W or 10W laser cutter, most people adhere to cutting materials made of All Wood, Paper, Plastic, Leather, PCB Board, Aluminum Oxide, Non-Reflective Plating, And Lacquered Metal.


Think about getting the 20W laser if you wish to work with a variety of various types of materials. For the purposes of our projects, we have successfully cut through even the denser woodlands.

Precision

What should you do if you need to draw lines on a component that are extremely thin and accurate? In this scenario, we strongly advise you to avoid using the 20W laser head, even though the risk is still relatively low.


The spot size of the 20W laser is 0.08×0.10mm. Imagine that the laser spot is the point at which a laser pointer is pointed. If the RAY uses this laser pointer to cut, you will want the tip to be as small as it possibly can be.


The laser spots of the 5W are 0.08×0.08mm, and the 10W are 0.06×0.06mm lasers. The laser spot of the 20W laser is significantly larger.

So, if you require an accurate component, you should stick to either the 5W or the 10W.

Different Engraving Capability

Pieces can also be engraved with this type of laser cutter, which is another useful function of these machines. A small amount of material is removed from the top surface to produce designs via engraving. Because engraving does not go as deep as cutting, the power required is not as significant.


The 5W RAY's capacity to engrave is significantly improved thanks to a smaller laser point and higher precision than its predecessor.


 Because the component only needs one pass with the laser, and the routing speed is the same across the board for these three possibilities, the 5W is the one that should be chosen.


If you need to engrave and cut the same object, going with the 10W laser might be the best choice for you. It possesses an excellent equilibrium of slicing force and accuracy.

Make Colourful Creations

The ability to generate colorful engravings on metal is a special capability that is exclusive to the 20W LONGER RAY 5 and cannot be found on any other machine. What is the mechanism behind this? Because of the increased power provided by the 20W laser, it is capable of oxidizing metal at a variety of rates. It's hard to believe when you see it in person.


Altering the laser's power causes the metal's oxidation to occur at varying rates, ultimately producing a variety of colors. It is effective on brass, copper, stainless steel, and titanium in addition to aluminum. The only difference is the range of colors that are available to you (which depends on the metal type).


Lasers with 5W and 10W outputs are not powerful enough to accomplish this task. You'll need the 20W model if you wish to create vivid engravings on metal.

What Different Material Can Different Laser Power Cut Or Engrave?

Cutting using a laser can be done on a wide variety of materials, including but not limited to wood, paper, plastics, glass, leather, foam, textiles, and metals. By selecting the parameters that are most suitable for the laser, one can ensure that the cuts produced are of high quality and have a smooth surface finish. On the other hand, it is not suggested to use a laser cutter for cutting certain materials, such as vinyl or ABS.


To produce the desired cut, a laser cutter operates by concentrating a high-energy laser beam on the surface of the substance it is cutting. This causes the material to burn and evaporate.


When being worked on by a laser, each material exhibits its own unique characteristics and necessitates a unique configuration of the various laser parameters to achieve a clean cut with a high level of surface finish.


Aside from that, the capacity of a laser to cut through the material is determined by the sort of laser that is being employed.


In general, laser cutting works best with natural materials like wood, paper, leather, and metals, among other things, because these materials produce no or only a limited amount of potentially dangerous by-products.

Final Takeaway

The best possible outcome will be achieved with a laser power that is tailored specifically to the constituent material. For example, engraving paper uses significantly less power than engraving wood does on average. A minimal amount of power is required to achieve an engraving that is uniformly homogenous in acrylic and is not very deep. In addition, having a higher power enables speedier work while processing engraving materials.


The software allows for straightforward control of the laser's output power. Nonetheless, the hardware has a role in determining the maximum power. The following criteria must be met: You are able to process a wide variety of materials with a laser machine that has a high laser power, which provides you with a great deal of freedom.

By Academy | February 28, 2025
How to operate RAY5 Laser engraving machine

Introdution:
LaserBurn Is a powerful APP designed for LONGER laser engraving machine users, designed for Nano and B1 series laser engraving machines, designed to enhance the user engraving experience and convenience. Both novice and professional, LaserBurn meets the needs of users to control laser engraving machines through mobile phones.
LaserBurn APP Users can directly control their own LONGER laser engraving machine from their smartphones, so what specifically can LaserBurn provide more convenient access and operation for the use of Longer Nano? Let me briefly introduce the steps to use LaserBurn APP:


STEPS


01. Calibrating Laser
a.Place the machine on a flat table and make sure that the machine is stable and will not shake.
b.Place the wood board to be engraved or cut under the laser
c.Loosen the two thumb screws on the front of laser head by hand. Then place the focusing column vertically on the bottom of the laser head form the rear side, and manually  lift the laser head so that the bottom of the rear side of the laser is close to the upper surface of the calibration column.
d.Tihten the two laser thumbscrews, then remove the focusing column

02. Power Up
a.Find the adapter and power cable and connect them.
b.Connect the power cord to the power supply and connect the other end of the adapter to the power port of the motherboard.
c.Connect the computer and the engraving machine through a USB computer (or insert a Micro SD card).
d.To Turn ON your RAY5 by press the power switch (To Turn OFF your RAY5 by press the power switch once again.)

03. Touch Screen Operation
RAY5 has a full-color 3.5-inch touch screen with a user-friendly user interface. Engraving and cutting work can be operated with touch screen and SD card.

04. Wi-Fi Control operation
Enter the IP address in the browser of mobile phone or computer, then the control interface will pop up

LaserGRBL Software Operation and Setup

LaserGRBL is an easy-to-use and fully free software for laser engraver only running on Windows.
a.Find LaserGRBL software in attached SD card(path:/software),Or download from the link: https://lasergrbl.com/download/
b.After installing laserGRBL, power up the RAY5, press the power switch button, and connect the laser engraver and computer via USB cable.
c.Open LaserGRBL, select correct port(depend on your PC), baud rate: 115200. Then click connect button.(If you cannot find correct port, please install CH340 driver manually by click Menu >> Tools >> Install CH340 Driver in LaserGRBL)

Usage

1. Main Interface

2. Open file and set parameters

3. Start to engrave
Place a board under the laser, then calibrate the laser.
Move the laser head to the place you want.
Click “Frame” button to check the work frame.
Click  button to start engraving.

Or you can save gcode file to SD card by click “File” >> “Quick Save” for offline working

More help information about LaserGRBL, please refer to the link: https://lasergrbl.com/usage/

LightBurn Software Operation and setup

LightBurn is a professional software for engraver, a charging software running on Windows, macOS, and Linux. It provides a trial period. You could pay for it afterward if you like it.
a. Find Lightburn software in SD card(path: /software) came with the package. Or just download from the link:

https://lightburnsoftware.com/download/
b. After installing Lightburn, power up the RAY5, press the Power Switch button, and connect the laser engraver and computer via USB cable.
c. For the first time launching LightBurn, it will prompt a   “New Device Wizard” for help you setup machine.
d. Select GRBL form the list, then click “Next” button

e.Select Serial/USB and press “Next” button.

f.Fill your Device Name, X, Y axis, then click “Enter” button 
Name: RAY5
X = 400
Y = 400
g.Select “Front Left” as your Origin X,Y and activate “Auto ‘Home’”, then click “Next” button.

h.Select RAY5 and press Make Default. Your RAY5 is ready to  be used in LightBurn software.

Main interface

Select correct port(depends on your PC), then the RAY5 is connected to the computer. 

Click Menu “File” >> “Import image from disk.” Or just use draw tool on left column to design your own pattern

Set the name, speed, maximum power, mode, and other parameters in the cutting/layer; (engraving function and cutting function are only different in speed, power. Normally, the cutting speed parameter is slower)

After placing the board under the laser, click Frame to check the laser path whether is completely inside of the board.

Click “Start” to start to work.

Or you can save gcode file to SD card by click “Save GCode” button in Laser panel for offline working

More help information about lightburn, please refer to the link: 

https://lightburnsoftware.com/pages/tutorials

APP Operation
RAY5 can be controlled or engraved through MKSLaser APP when the engraver and APP are connected to the same WIFI. 
Please search for "MKSLaser" in Google play or app store or visit the address below to download Android system https://play.google.com/store/apps/details?id=makerbase.com.mks laser
Please search for "MKSLaser" in the app store or visit the address below to download https://apps.apple.com/us/app/mkslaser/id1542756280?uo=4&at= 11l6hc&app=itunes&ct=fnd for Apple system

By Academy | January 20, 2025
Material Testing for Longer Ray5 10W & 5W

Longer Ray5 5W and Longer Ray5 10W allow you to engrave and cut different types of materials, quickly and easily. However, for each type of processing it is necessary to set different parameters regarding power and speed, precisely because each type of material reacts differently to the laser beam.


To have a reference, about what power and speed to adopt for each type of material, there is a fairly complete table accurately reporting the best parameters to use.

However, the table can only be understood as a general reference; in fact, assuming you want to cut the BassWood with Longer Ray5 10W, the recommended parameter is 100% Power & 350 mm/min Speed, but there are various types of BassWood, and each one reacts differently during cutting, so it is not said that these parameters are perfect for each type of BassWood, since some BassWood could be burned instead of simply cut or not cut at all.


In order to obtain the correct parameters for the type of BassWood you intend to cut, Lightburn has a powerful Material Test tool, which allows you to quickly determine the most specific and correct parameters. From the Lightburn home screen, select Laser Tools – Material Test, this screen will open:
 

First, set the Count value to 5 for Vertical and Count to 4 for Horizontal; Also, set Height and Width to 5.00 mm.

Since the recommended parameters for cutting the BassWood are 100% Power & 350 mm/min Speed, you can set a range between 100 and 500 mm/min for Speed and a range between 50% and 80% for Power (so as to avoid stressing the laser with 100% power).

Next, proceed with Edit Text Setting:

This screen is used to engrave the labels of the test table. Since it is an engraving, set 3000 mm/min Speed and 50% Power; Also, set Mode Fill.
Confirm by pressing OK.

At this point, proceed with Edit Material Settings:

In this screen you can set the method of processing the material; since it is a matter of cutting, select Mode Line, and possibly set Number of Passes to 1 or more.
Confirm by pressing OK.

Once back on the main screen, press Save Gcode to export the test file, copy it to the microSD and start testing on Longer Ray5.

When Ray5 has completed the job, reviewing the table will help you determine which parameters are best to set.


Similarly, if you want to proceed with an engraving test instead of cutting, open the Material Test screen. Since the recommended parameters for engraving the BassWood are 35% Power & 3000 mm/min Speed, set the testing range as shown in the image below:
 

On the Edit Material Settings screen, since this is an engraving, select Mode Fill:

Once back on the main screen, press Save Gcode to export the test file, copy it to the microSD and start testing on Longer Ray5.

When Ray5 has completed the job, reviewing the table will help you determine which parameters are best to set.


Note that, before exporting the Gcode, both for a cut test and for an engraving test, you can always select Preview, which allows you to see in advance how the final result will look.

Above is the introduction of parameter settings and material testing , hope it can help you. If you still have any questions during the operation, please visit our Support Page. Our knowledgeable staff is happy to assist you and your team with any questions.


The Longer Laser RAY5 Series is capable of engraving a wide range of materials including plywood, basswood, hardwood, pinewood, acrylic, kraft paper, stainless steel, aluminum alloy, ceramics, and more. Additionally, the Longer RAY5 can cut materials such as basswood, acrylic, bamboo, kraft paper, and more.


With its powerful engraving and cutting capabilities, it transcends boundaries to become the best engraving machine and the best laser cutter for a variety of materials. Seamlessly transition from a wood laser cutter to a metal laser engraver, or even become a master jewelry engraver. Discover boundless unlimited potential with the Longer Laser RAY5 Series.

By Academy | January 6, 2025

!