
Mesh Bed Levelling for LK4PRO & LK5PRO - LONGER
Mesh Bed Levelling for LK4PRO & LK5PRO

LO

Some users of Longer FDM printers prefer to use a BL-TOUCH automatic leveling system in order to obtain more precise and higher quality prints, as well as making the printing bed leveling process easier and more immediate.

However, the standard automatic leveling procedure is for the BL-TOUCH sensor to remeasure the plane points before each new print. This procedure takes time, and is often useless, especially in the case of making daily prints, the print bed maintains calibration and the printer is never moved. If these conditions are met, then you can simply recall a previous plan mesh before starting a new print, without the need to create a new one.

If you want to print using the last saved mesh, simply change the START GCODE for BL-TOUCH to the following START GCODE:

-- BL-TOUCH START GCODE --
G21 ; metric values
G90 ; absolute positioning
M82 ; set extruder to absolute mode
M107 ; start with the fan off
; confirm BL-touch safety
M280 P0 S160 ; BL-Touch Alarm release
G4 P100 ; Delay for BL-Touch homing
G28 X0 Y0 ; move X/Y to min endstops
G28 Z0 ; move Z to min endstops
; reconfirm BL-touch safety
M280 P0 S160 ; BL-Touch Alarm realease
G4 P100 ; Delay for BL-Touch
; bed leveling
M420 S1 Z5 ; enable bed leveling
; prepare hot-end
G92 E0 ; Reset Extruder
G1 Z2.0 F3000 ; Move Z Axis up little to prevent scratching of Heat Bed
G1 X0.1 Y20 Z0.3 F5000.0 ; Move to start position

G1 X0.1 Y150.0 Z0.3 F1500.0 E15 ; Draw the first line

G1 X0.4 Y150.0 Z0.3 F5000.0 ; Move to side a little

G1 X0.4 Y20 Z0.3 F1500.0 E30 ; Draw the second line

G92 E0 ; Reset Extruder

G1 Z2.0 F3000 ; Move Z Axis up little to prevent scratching of Heat Bed

G1 X5 Y20 Z0.3 F5000.0 ; Move over to prevent blob squish
; -- end of BL-TOUCH START GCODE --

In this way, printing will start immediately, without mesh the print bed, using the last calibration made. However, sometimes you will need to create a new mesh, especially if the print plate has been moved or if the printer has been moved; in this case, simply create open "Notepad" on your laptop and paste the following GCODE:

; bed leveling
G28 X0 Y0 ; move X/Y to min endstops
G28 Z0 ; move Z to min endstops
G29; Auto leveling
M500 ; save data of G29 and M420
M420 S1 ; enable bed leveling

For last, save the file as levelling.gcode (be careful, do not save as .txt) and copy the GCODE you just created into the microSD of your printer. Whenever it will be necessary to calibrate the printing plate, simply start the GCODE from the printer display, like any other print file, and wait for the measurement to complete.

By Software | August 23, 2023
BL-Touch Installing Guide for LK4PRO & LK5PRO - LONGER
BL-Touch Installing Guide for LK4PRO & LK5PRO

Longer LK4PRO & LK5PRO are two FDM printers capable of producing high-quality 3D prints. However, you can increase the ease and quality of printing by installing a BL-TOUCH or 3D-TOUCH compatible automatic leveling sensor.

Preparation

  • Prepare a USB cable, using a piece of insulating tape, as shown in the figure:

    Prepare a USB cable, using a piece of insulating tape

Wiring

  1. Switch-off the printer
  2. Find the position of motherboard, then screw down the mainboard cover
  3. Unplug the Z-MIN wire (2-pin) from the mainboard
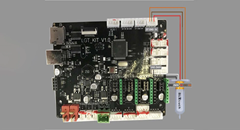
  4. Connect the sensor's cables to the motherboard, as the picture below shows.
    Connect the sensor's cables to the motherboard
  5. Screw up the mainboard cover
  6. Remove the Z endstop switch, as picture showing below
    Remove the Z endstop switch
  7. Screw down the left 2 screws of the printhead module and mount the BL-TOUCH as picture showing below (follow the same step if you have DualBlower)
    Screwdown left 2 screws of PrintHead module and mount the BL-TOUCH

Configuration

  • Confirm BL-TOUCH wiring and mounting is complete
  • Power ON the printer
  • Connect PC and printer with the modified USB cable.
  • Open Pronterface software, select serial port (115200 baudrate) and connect it to the printer

Adjusting Z-Offset

  1. Clean up bed and nozzle, and ensure no materials stick on
  2. Send M851 Z0 to reset Z offset value.
  3. Send G28 to home XYZ axis
  4. Send G1 F60 Z0 to lower Z axis to the software origin.
  5. Send M211 S0 to inactivate software endstop function
  6. Place a sheet of paper (0.10 mm approximately) on the bed and use Pronterface to lower the nozzle 0.1 mm by 0.1 mm until you feel friction between the nozzle and the sheet of paper (the paper is not to be jammed but not too free either). Then remove the sheet
  7. Send M114 to get the current Z height value (usually negative) and take note of it. This is the z-offset value we need
  8. Send M851 Z-x.x to set z-offset. (x.x is the value of previous value; for example, if previous value is -1.2, then send M851 Z-1.2.)
  9. Send M500 to save current settings
  10. Send M211 S1 to reactivate software endstop function.
  11. Send G28 to home XYZ axis
  12. Send G1 F60 Z0 to test if the Z axis could go back to the actual Z origin by checking the clearance between the bed and the nozzle if it is about 0.1 mm (the thickness of a sheet of paper). If not, please repeat steps from 1 to 11.

START GCODE replacement

Inside the Slicer software (Cura, Slic3r, Simplify3D), replace the original START GCODE with the following START GCODE for BL-TOUCH.

-- BL-TOUCH START GCODE --
G21; metric values
G90: absolute positioning
M82: Set extruder to absolute mode
M107: start with the fan off
; confirm BL-touch safety
M280 P0 S160 ; BL-Touch Alarm release
G4 P100 ; Delay for BL-Touch homing
G28 X0 Y0 ; move X/Y to min endstops
G28 Z0 ; move Z to min endstops
; reconfirm BL-touch safety
M280 P0 S160 ; BL-Touch Alarm Release
G4 P100 ; Delay for BL-Touch
; bed leveling
G29: Auto leveling
M420 Z5 ; set LEVELING_FADE_HEIGHT
M500: save data of G29 and M420
M420 S1 ; enable bed leveling
; prepare hot-end
G92 E0 ; Reset Extruder
G1 Z2.0 F3000 ; move the Z Axis up little to prevent scratching of the heat bed.
G1 X0.1 Y20 Z0.3 F5000.0 ; Move to start position

G1 X0.1 Y150.0 Z0.3 F1500.0 E15 ; Draw the first line

G1 X0.4 Y150.0 Z0.3 F5000.0 ; Move to side a little

G1 X0.4 Y20 Z0.3 F1500.0 E30 ; Draw the second line

G92 E0 ; Reset Extruder

G1 Z2.0 F3000 ; move the Z Axis up little to prevent scratching of the heat bed.

G1 X5 Y20 Z0.3 F5000.0 ; Move over to prevent blob squish
; -- end of BL-TOUCH START GCODE --

By Software | August 23, 2023
Lens Cleaning for Longer Ray5 10W

Keeping your Longer Ray5 10W lens cleaning routine consistent is one of the most important maintenance tasks for maintaining engraving quality and cutting performance. During engraving and cutting, smoke, dust, and residue gradually build up around the laser module. Over time, this contamination can reduce laser output and negatively affect results.

This guide explains exactly how to clean the lens window and nozzle of the Longer Ray5 10W safely while preserving the original maintenance process.


Table of Contents


Quick Answer

Dirty lenses and nozzles can significantly reduce the output power of a laser engraver. To perform Longer Ray5 10W lens cleaning, turn off and unplug the machine, remove dust using an air blower, gently clean with high-purity alcohol and lint-free swabs, inspect the lens carefully, and reinstall components after they are completely clean and dry.


What This Guide Covers

This tutorial will help you learn:

  • Why lens contamination affects engraving quality
  • Required tools and preparation steps
  • How to safely clean the laser lens window
  • How to clean the Ray5 10W nozzle
  • Common troubleshooting situations
  • Maintenance tips for extending laser life

Why Longer Ray5 10W Lens Cleaning Matters

The lens window inside the laser module acts as a protective barrier for internal optical components.

During laser engraving, smoke particles and debris gradually settle onto the lens surface. As contamination increases:

  • Laser output becomes weaker
  • Cutting depth decreases
  • Engraving appears faded
  • Lines become blurry
  • More power becomes necessary for the same results
  • Laser modules may experience unnecessary stress

Users often assume the issue is caused by incorrect software settings or material parameters when the actual cause is simply a dirty optical surface.

A clogged nozzle can create similar issues because airflow becomes restricted, reducing cooling efficiency and smoke removal.


Before You Start

Requirements

Prepare the following tools:

For lens cleaning:

  • Anhydrous alcohol (≥99% purity)
  • Lint-free cotton swabs or lens cleaning sticks
  • Air blower or camera dust blower
  • Gloves (optional)

For nozzle cleaning:

  • Anhydrous alcohol
  • Lint-free swabs
  • Fine needle, nozzle cleaner, or toothpick
  • Small soaking container

Follow official machine specifications or instructions.


Precautions

Before cleaning your machine:

⚠️ Turn off the laser engraver completely

⚠️ Unplug the power cable

⚠️ Allow the laser module to cool completely

⚠️ Never use paper towels or clothing

⚠️ Never apply excessive pressure to the lens

⚠️ Avoid touching coated lens surfaces with fingers

⚠️ Do not wipe back and forth across the lens

The coating on a laser lens can be damaged by scratches, and even small damage may permanently reduce performance.


Step-by-Step Longer Ray5 10W Lens Cleaning Tutorial

Step 1: Remove the Lens Window

Action:

Gently unscrew the lens holder (typically counterclockwise).

Place the lens on a clean and soft surface.

Expected Result:

The lens should be safely separated and accessible for cleaning.

Important Notes:

Avoid placing the lens on rough surfaces.


Step 2: Blow Off Surface Dust

Action:

Use an air blower to remove loose particles from both sides of the lens.

Expected Result:

Dust particles should be removed before wiping begins.

Important Notes:

Removing particles first helps avoid scratching during cleaning.


Step 3: Clean with Alcohol

Action:

Take a new lint-free swab and add 1–2 drops of anhydrous alcohol.

The swab should be damp, not dripping.

Begin at the center of the lens and wipe outward using a spiral motion.

Repeat with a new swab if deeper cleaning is necessary.

Expected Result:

Smoke residue and fingerprints should gradually disappear.

Important Notes:

Do not wipe back and forth.


Step 4: Dry and Inspect

Action:

Use a clean dry lint-free swab to absorb any remaining alcohol.

Hold the lens toward a light source and inspect multiple angles.

Expected Result:

The lens should appear clear and free of:

  • Dust
  • Fingerprints
  • Water spots
  • Smudges

Important Notes:

If contamination remains, repeat previous steps.


Step 5: Reinstall the Lens

Action:

Clean the holder if necessary using the air blower.

Reinstall the lens in its original orientation.

Secure the retaining ring.

Expected Result:

The lens should fit properly and remain stable.

Important Notes:

Do not overtighten.

Incorrect installation can damage the lens.

If orientation is unclear:

Follow official machine specifications or instructions.


How to Clean the Ray5 10W Nozzle

Step 1: Remove the Nozzle

Action:

Unscrew the nozzle beneath the laser head counterclockwise.

Expected Result:

The nozzle should separate from the module.

Important Notes:

Some accumulated debris may fall out.


Step 2: Remove Blockages

Action:

If blockage exists, use:

  • Fine needle
  • Nozzle cleaner
  • Toothpick

Gently remove debris.

Expected Result:

The air passage should become unobstructed.

Important Notes:

Do not scratch internal surfaces.


Step 3: Soak and Clean

Action:

For stubborn residue:

Soak the nozzle in anhydrous alcohol for 10–15 minutes.

Use a soft brush or lint-free swab.

Expected Result:

Oil and residue should loosen.


Step 4: Dry Completely

Action:

Rinse again with fresh alcohol.

Use an air blower for drying.

Expected Result:

No moisture should remain.

Important Notes:

Residual moisture may affect cutting quality.


Step 5: Reinstall Nozzle

Action:

Reinstall the dry nozzle and tighten carefully.

Expected Result:

The nozzle should sit securely.


Common Problems and Solutions

Problem Requirements Solution
Weak engraving results Check lens contamination Clean lens window
Reduced cutting depth Check lens and nozzle Remove smoke residue
Uneven engraving lines Inspect optical surfaces Clean lens again
Large unusual sparks Inspect contamination Clean immediately
Strong ozone-like smell Check lens condition Remove contamination from lens surface
Air assist seems weak Inspect nozzle blockage Clean nozzle opening

Symptoms above are common signs that maintenance may be required.


Tips for Better Results

  1. Use an air blower before every engraving session.
  2. Perform visual inspections weekly or every 40 operating hours.
  3. Clean immediately if laser power suddenly decreases.
  4. Wear gloves during cleaning to avoid fingerprints.
  5. Store cleaning tools in dust-free containers.

Helpful related guides:


Frequently Asked Questions

Q: How to clean Longer Ray5 10W lens for beginners?

A: Power off the machine, remove dust with an air blower, use a lint-free swab with anhydrous alcohol, clean in spiral motion, inspect, and reinstall.


Q: Why is my Ray5 10W laser losing power?

A: A dirty lens is a common cause. Smoke buildup can block laser transmission and reduce output power.


Q: How often should I perform laser engraver lens cleaning?

A: Blow off dust daily or before use. Perform deeper inspections weekly or approximately every 40 operating hours.


Q: Can I use paper towels?

A: No. Paper towels may leave fibers and can scratch optical coatings.


Q: What alcohol should be used?

A: Use anhydrous alcohol with at least 99% purity.


Q: Can a dirty nozzle affect engraving?

A: Yes. A clogged nozzle may reduce airflow and cooling efficiency, affecting engraving and cutting quality.


Q: What happens if I wipe back and forth?

A: Back-and-forth wiping may drag particles across the lens and increase the chance of scratches.


Final Thoughts

Proper Longer Ray5 10W lens cleaning is simple maintenance that can dramatically improve engraving consistency and restore cutting performance. Small amounts of smoke residue may gradually reduce laser efficiency, so regular inspection and cleaning help keep your machine operating at its best.

If you're maintaining your Ray5 regularly, explore additional setup, focusing, and troubleshooting resources through the LONGER knowledge base and support materials.

By Software | July 25, 2023
Lens Cleaning for Longer Ray5 5W - LONGER
Lens Cleaning for Longer Ray5 5W

Keeping your machine clean is one of the most important parts of laser engraver maintenance. This guide explains how to perform proper Longer Ray5 5W lens cleaning safely and correctly to maintain engraving quality, prevent laser power loss, and extend the lifespan of your laser module.


Table of Contents


Quick Answer

To clean the lens on the Longer Ray5 5W laser engraver, carefully remove dust and residue from the laser lens using appropriate cleaning materials and gentle handling techniques. Regular lens cleaning helps maintain engraving precision, prevents burning issues, and improves laser performance.


What This Guide Covers

This beginner-friendly tutorial explains:

  • Why lens cleaning is important
  • What tools and materials you need
  • Safety precautions before maintenance
  • Step-by-step instructions for cleaning the Longer Ray5 5W lens
  • Common problems caused by dirty lenses
  • Maintenance tips to improve engraving quality

Whether you are new to laser engraving or maintaining your machine regularly, this guide will help you clean your laser lens safely and effectively.


Why Longer Ray5 5W Lens Cleaning Matters

The laser lens is one of the most important components inside the laser module. During engraving and cutting, smoke, dust, resin, and debris can accumulate on the lens surface.

A dirty lens can cause:

  • Reduced laser power
  • Poor engraving quality
  • Uneven cutting results
  • Burn marks
  • Overheating of the laser module
  • Shortened laser lifespan

Regular laser engraver maintenance helps keep your machine operating efficiently and reduces the chance of expensive repairs.

For users engraving wood, leather, acrylic, or coated materials frequently, lens cleaning becomes even more important because smoke residue builds up faster.


Before You Start

Requirements

Before starting the Longer Ray5 5W lens cleaning process, prepare the following:

  • Longer Ray5 5W laser engraver
  • Clean working environment
  • Appropriate lens cleaning materials
  • Soft cleaning tools suitable for optical components

Follow official machine specifications or instructions.


Precautions

Before cleaning the laser lens, keep these safety tips in mind:

  • Turn off the machine completely before maintenance.
  • Disconnect power if required by official instructions.
  • Avoid touching the lens surface directly with fingers.
  • Never use excessive force while cleaning.
  • Do not use abrasive materials on optical components.
  • Keep dust and debris away from the laser module during cleaning.

Improper cleaning can damage the optical lens coating and affect laser performance permanently.


Step-by-Step Longer Ray5 5W Lens Cleaning Tutorial

Step 1: Power Off the Machine

Action

Turn off the Longer Ray5 5W laser engraver before starting any maintenance procedure.

Expected Result

The machine is completely powered down and safe to handle.

Important Notes

Never clean the laser module while the machine is operating. Cleaning while powered on may damage components or create safety risks.


Step 2: Access the Laser Lens Area

Action

Carefully access the lens area of the laser module according to the official machine structure.

Expected Result

The laser lens becomes visible and accessible for cleaning.

Important Notes

Handle the laser module carefully to avoid damaging internal optical parts.

If you are unsure about disassembly or access procedures, follow official machine specifications or instructions.


Step 3: Inspect the Lens Surface

Action

Check the lens surface carefully for dirt, smoke residue, fingerprints, or debris accumulation.

Expected Result

You can identify whether the lens requires light cleaning or more thorough maintenance.

Important Notes

A clean lens should appear clear and free from haze or dark spots.

Heavy smoke buildup may reduce laser output significantly.


Step 4: Clean the Lens Carefully

Action

Use appropriate optical cleaning materials to gently clean the lens surface.

Expected Result

The lens surface becomes clean and transparent without scratches or residue.

Important Notes

  • Use gentle movements only.
  • Avoid excessive pressure.
  • Do not scratch the optical surface.
  • Never use rough cloth or paper towels.

Improper cleaning methods may permanently damage the lens coating.


Step 5: Check for Remaining Residue

Action

Inspect the lens again after cleaning to confirm all visible residue has been removed.

Expected Result

The lens appears clean, clear, and free from contamination.

Important Notes

If residue remains, repeat the cleaning process carefully using approved methods.

Do not continue rubbing aggressively if contamination does not come off easily.


Step 6: Reassemble the Laser Module

Action

Reinstall or close the laser module components after cleaning is complete.

Expected Result

The laser module returns to its normal operating condition.

Important Notes

Ensure all parts are properly secured before restarting the machine.

Loose components may affect engraving precision.


Step 7: Test the Machine

Action

Power on the Longer Ray5 5W and perform a test engraving or cutting task.

Expected Result

The machine should produce cleaner engraving lines and more consistent laser output.

Important Notes

If engraving quality does not improve, inspect the lens again or check for additional maintenance needs.


Common Problems and Solutions

Problem Requirements Solution
Weak laser power Inspect lens condition Clean the lens carefully
Burn marks during engraving Check for smoke buildup Remove residue from optical components
Inconsistent cutting depth Verify lens cleanliness Re-clean the lens and test again
Blurry engraving results Inspect optical surface Ensure the lens is free from haze or fingerprints
Excessive smoke residue buildup Improve ventilation Clean the machine more frequently
Lens scratches Inspect cleaning method Use only approved optical cleaning materials

Tips for Better Results

Clean the Lens Regularly

Frequent maintenance prevents heavy smoke buildup and helps maintain consistent engraving quality.

Improve Airflow Around the Machine

Good ventilation reduces smoke accumulation inside the laser module.

Avoid Touching the Lens Directly

Fingerprints can leave oils on the optical surface and reduce laser performance.

Inspect the Lens Before Long Jobs

Checking the lens before large engraving projects helps avoid failed workpieces.

Keep the Workspace Clean

Dusty environments increase contamination inside the laser module.


Related Longer Laser Engraver Guides

If you want to improve your machine performance further, these tutorials may also help:


Frequently Asked Questions

Q: How often should I perform Longer Ray5 5W lens cleaning?

A: Cleaning frequency depends on usage and materials. Machines used frequently for wood or acrylic engraving may require more regular cleaning.


Q: Why does my laser engraver lens get dirty quickly?

A: Smoke, resin, dust, and debris produced during engraving can accumulate on the lens surface, especially when ventilation is limited.


Q: Can a dirty lens reduce laser power?

A: Yes. A dirty lens can block or scatter the laser beam, reducing engraving strength and cutting efficiency.


Q: What happens if I do not clean the laser lens?

A: Poor maintenance may lead to weak engraving results, overheating, inconsistent cuts, or shortened laser module lifespan.


Q: Is laser engraver lens cleaning safe for beginners?

A: Yes, as long as users follow official instructions carefully and handle optical components gently.


Q: Can I use regular paper towels to clean the lens?

A: Avoid abrasive materials or rough paper products because they may scratch the optical coating.


Q: How do I know if my lens is damaged?

A: Visible scratches, permanent haze, or reduced engraving quality after cleaning may indicate lens damage.


Q: What materials create the most lens residue?

A: Wood, leather, acrylic, and smoky materials often produce more debris and smoke buildup during engraving.


Final Thoughts

Proper Longer Ray5 5W lens cleaning is essential for maintaining engraving precision, improving cutting performance, and extending the life of your laser module.

By following the correct cleaning process carefully and performing regular maintenance, you can keep your laser engraver operating efficiently while reducing the risk of poor engraving results or hardware issues.

For additional maintenance tutorials and setup guides, explore more resources on Longer’s official website.

By Software | July 25, 2023
Text Layout Cutting with Lightburn and Longer Ray5 - LONGER
Text Layout Cutting with Lightburn and Longer Ray5

Longer Ray5 allows you to engrave and cut multiple types of materials. In particular, many users of Longer Ray5 prefer to create a custom text and then engrave or cut it on wood panels or similar material. Engraving a text using the laser beam is not a big problem, as it is sufficient to set the right parameters for the type of material chosen, and the result will be excellent. However, if you want to cut (e.g., on wood or paper) your custom text, then setting the right parameters may not be enough.

In fact, depending on the type of text chosen, it may be necessary to make manual changes to the text so that the cut can take place correctly. Analyzing the issue in detail, assuming you want to laser cut the word "NICE," then there is no problem; however, if the word is "HELLO," then it should be noted that the letter "O" consists of a closed surface, which when cut will fall away from the material and thus change the layout of the letter "O."

Specifically, this problem occurs with all letters that contain a closed surface within them, such as the letters "A – B – D – O – P – Q – R."

Using LightBurn software, you can solve this problem really easily and quickly. In detail, first you proceed with the creation of your own personalized text within LightBurn. After entering the text, you will visually check for any letters that have problems when cutting.

In the example given here, there are some letters that cannot be cut correctly and therefore need to be corrected first. The solution to this problem lies in eliminating the closed surface inside the letter: to do this, just create a "bridge" that connects this closed surface with the rest of the letter.

In this way, after making the cut, this closed surface will remain attached to the cut panel, and therefore the layout of the letter will not be changed.

In particular, you must manually create a small rectangle, which must be pasted inside each problematic letter in order to create a bridge between the closed surface of the letter and the letter itself, as shown in the example below. After that, you have to make a Boolean subtraction between the letter and the rectangle.

We proceed to insert a rectangle for each letter that needs to be corrected, then we proceed with the subtraction (the procedure must be repeated for each letter, one letter at a time). Finally, the end result will look like this:

At this point, you can make a cutting preview or proceed with the export of the G-code on the microSD of Longer Ray5 and perform the cut (always remembering to set the correct parameters first to be able to cut the type of material chosen).

This technique can also be applied when using different text layouts, such as italic text or number format, so that you always eliminate any closed surfaces that prevent you from making a correct laser cut.

By Software | July 6, 2023
Engraving & Cutting with Lightburn and Longer Ray5 - LONGER
Engraving & Cutting with Lightburn and Longer Ray5

Longer Ray5 allows you to engrave and cut multiple types of materials. In particular, many users of Longer Ray5 prefer to carry out engraving and cutting work at the same time, especially when it comes to working with wood panels; however, engraving and cutting do not necessarily have to be two distinct processes, as using Lightburn, you can perform both machining operations in one operation.

In particular, after opening an image in LightBurn, proceed to set the engraving parameters in the window on the right of the screen. I know that the engraving parameters are those of the model image.

After setting the engraving parameters, right-click with the mouse on the imported image, then select Trace Image.

In the screen that opens, define the quality of the cutting perimeter by increasing or decreasing the Threshold value, then confirm by pressing OK.

The image will be superimposed by a perimeter, as set in the previous screen, and at the same time in the window on the right of the screen will appear a new entry relating to the cut to be made, indicated with Model Line. For Model Line, set image cropping parameters, such as speed, power, and number of passes.

At the end, press Save Gcode to export the working file to the microSD of Longer Ray5, then proceed to start working on Longer Ray5. Alternatively, before exporting the GCode, you can check the simulation of the engraving and cutting process by pressing Preview.

In this way, Longer Ray5 will engrave the selected image, after which it will cut the image following the perimeter set above.

Above is the introduction of the first layer calibration; I hope it can help you. If you still have any questions during the operation, please visit our Support Page. Our knowledgeable staff is happy to assist you and your team with any questions.

Want to learn more about RAY5 Laser Engraver? Check out the video below.

https://www.youtube.com/playlist?list=PLLz1z_0pXsW0rjYbC2V_upO1YlU4HeuAg

Step into a world of precision craftsmanship with LONGER RAY5 Series. These high-accuracy laser engravers and cutters redefine what's possible, effortlessly mastering materials with unparalleled precision and ease. Whether you seek to infuse your home with personalized charm or elevate your professional projects, these versatile machines seamlessly adapt to your needs. Their compact design makes them an excellent choice for home laser engravers and cutters, adding a touch of sophistication to your creative space. Meanwhile, their precision engineering makes them equally at home in the professional arena, where they serve as the quintessential desktop laser cutter, providing industrial-grade precision right at your fingertips. Explore limitless possibilities and unlock your creativity with Longer RAY5 Series.


Read more

By Software | June 19, 2023
Material Testing for Longer Ray5 10W & 5W

Longer Ray5 5W and Longer Ray5 10W allow you to engrave and cut different types of materials, quickly and easily. However, for each type of processing it is necessary to set different parameters regarding power and speed, precisely because each type of material reacts differently to the laser beam.

To have a reference about what power and speed to adopt for each type of material, there is a fairly complete table accurately reporting the best parameters to use.

about what power and speed to adopt for each type of material

However, the table can only be understood as a general reference; in fact, assuming you want to cut the basswood with Longer Ray5 10W, the recommended parameter is 100% power & 350 mm/min speed, but there are various types of basswood, and each one reacts differently during cutting, so it is not said that these parameters are perfect for each type of basswood, since some basswood could be burned instead of simply cut or not cut at all.

In order to obtain the correct parameters for the type of basswood you intend to cut, Lightburn has a powerful material test tool, which allows you to quickly determine the most specific and correct parameters. From the Lightburn home screen, select Laser Tools – Material Test; this screen will open:

select Laser Tools – Material Test

First, set the Count value to 5 for Vertical and Count to 4 for Horizontal; Also, set Height and Width to 5.00 mm.

Since the recommended parameters for cutting the basswood are 100% power & 350 mm/min speed, you can set a range between 100 and 500 mm/min for speed and a range between 50% and 80% for power (so as to avoid stressing the laser with 100% power).

Next, proceed with Edit Text Setting:

Edit Text Setting

This screen is used to engrave the labels of the test table. Since it is an engraving, set 3000 mm/min speed and 50% Power; Also, set Mode Fill.
Confirm by pressing OK.

At this point, proceed with Edit Material Settings:

Edit Material Settings

In this screen you can set the method of processing the material; since it is a matter of cutting, select Mode Line, and possibly set Number of Passes to 1 or more.
Confirm by pressing OK.

Once back on the main screen, press Save Gcode to export the test file, copy it to the microSD, and start testing on Longer Ray5.

When Ray5 has completed the job, reviewing the table will help you determine which parameters are best to set.

Similarly, if you want to proceed with an engraving test instead of cutting, open the Material Test screen. Since the recommended parameters for engraving the basswood are 35% Power & 3000 mm/min speed, set the testing range as shown in the image below:

set the testing range

On the Edit Material Settings screen, since this is an engraving, select Mode Fill:

the Edit Material Settings screen select Mode Fill

Once back on the main screen, press Save Gcode to export the test file, copy it to the microSD and start testing on Longer Ray5.

When Ray5 has completed the job, reviewing the table will help you determine which parameters are best to set.

Note that, before exporting the Gcode, both for a cut test and for an engraving test, you can always select Preview, which allows you to see in advance how the final result will look.

Lightburn Preview

Above is the introduction of parameter settings and material testing , hope it can help you. If you still have any questions during the operation, please visit our Support Page. Our knowledgeable staff is happy to assist you and your team with any questions.

The Longer Laser RAY5 Series is capable of engraving a wide range of materials, including plywood, basswood, hardwood, pinewood, acrylic, kraft paper, stainless steel, aluminum alloy, ceramics, and more. Additionally, the Longer RAY5 can cut materials such as basswood, acrylic, bamboo, kraft paper, and more.

With its powerful engraving and cutting capabilities, it transcends boundaries to become the best engraving machine and the best laser cutter for a variety of materials. Seamlessly transition from a wood laser cutter to a metal laser engraver, or even become a master jewelry engraver. Discover boundless, unlimited potential with the Longer Laser RAY5 Series.


Read more

By Software | May 30, 2023
Air Assist Kit installation for Longer Ray5 10W & 5W

Visible light and laser beam have in common the same nature, as both are composed of photons, however the difference between them is in the fact that visible light has an optically isotropic propagation (that is, it propagates identically in all directions) while in the laser all the energy is concentrated within a single beam of very small section. Therefore, when the laser hits matter, it is instantly able to radiate a great power in a very small area, causing a sudden and rapid increase in temperature that alters the state of matter.

Laser engraving machines, such as Longer Ray5, are able to emit a laser beam that instantly transforms the state of matter by combustion, and the contrast between the laser-subjected surface and the surrounding surface creates the visual effect commonly called Laser Engraving. However, the energy hitting a single point is not limited to that point, but the heat generated is also transmitted to the areas surrounding the point, causing the typical burning effect of laser processing.

In order to avoid or reduce this effect, an air assist mechanism can be used, which consists of a compressor capable of continuously blowing pressurized air directly onto the area subjected to the laser. In this way, the heat exchanged between the laser area and the surrounding area is mitigated by the fresh air of the Air Assist compressor, thus avoiding the burnt effect around the laser engraving. In addition, the air blown on the engraving zone cancels the heat exchange with the surrounding areas but does not damage the engraving ability of the laser beam. A simple example to understand this phenomenon can be this: if on a summer day with the sun high in the sky you go to the sea, if there is wind, then you feel cool, while if there is no wind, then you feel hot, but in both cases the sun causes burns to the skin in the same way.

Longer Ray5 10W Air Assist installation

The longer Ray5 10W has an official Air Assist kit that consists of two parts, the nozzle kit and the air compressor, available at the following link: https://eu.longer.net/products/air-assist-set .

Installing the Longer Air Assist on the 10W laser module is really easy; just follow the steps below:

  • First, proceed to disassemble the laser module from the rest of the machine

  • Install the metal nozzle on the laser module

  • Connect a rubber hose between the metal nozzle and the pressure regulator, and connect another part of the rubber hose to the regulator inlet

  • Connect the inlet pipe of the regulator to the outlet of the air compressor

    • Finally, install the laser module on the Ray5, activate the compressor switch and start an engraving from the Longer Ray5 display

Longer Ray5 5W Air Assist installation

To proceed with the installation of the Air Assist kit on the Longer Ray5 5W, it is necessary to purchase, as for the 10W version, the kit consisting of the nozzle kit and the air compressor, available at the following link: https://eu.longer.net/products/air-assist-set . However, the metal nozzle included inside the kit is compatible with 10W module only; therefore, it is necessary to have a 3D printer to print with PLA or PETG the following nozzle:https://www.thingiverse.com/thing:5585296 .

Installing the Longer Air Assist on the 5W laser module is really easy; just follow the same steps as the installing method for the 10W laser module, but install the 3D-printed nozzle on the laser module instead of the metal nozzle. After that, as mentioned, just follow the same steps as shown for installation on the 10W module.

Conclusions

The use of air assist not only increases the engraving quality but can also increase the laser's cutting capacity thanks to the possibility of removing smoke and combustion debris thanks to the continuous breath of air; without air assist, these would end up settling on the laser lens, hindering the output laser beam of the module. Whether for hobbyist or professional use, Longer Air Assist is absolutely recommended if you want to achieve the maximum performance offered by Longer Ray5 10W and Longer Ray5 5W.

https://eu.longer.net/collections/laser-engraver

By Software | May 9, 2023
Longer Honeycomb Working Table - LONGER
Longer Honeycomb Working Table

Laser engraving quality is affected by more than just the laser module itself. Accessories can also play a major role in cutting performance, smoke control, and workpiece quality. The Longer Honeycomb Working Table is designed to improve airflow during engraving and cutting while protecting work surfaces and helping users achieve cleaner results.

Whether you are a beginner making your first laser projects or an experienced maker running frequent jobs, understanding how a honeycomb table works can help improve workflow and consistency.


Table of Contents

  • What Is This Product?
  • Quick Answer
  • Key Features and Benefits
  • Compatible Models and Applications
  • Why Users May Need This Product
  • How to Use the Product
  • Common Questions or Issues
  • Tips for Better Results
  • Frequently Asked Questions
  • Final Thoughts

What Is This Product?

Quick Answer

The Longer Honeycomb Working Table is a laser engraving accessory that provides a stable support surface beneath materials during engraving and cutting. It improves airflow, reduces smoke accumulation, protects the working surface, and helps produce cleaner cutting edges.

It is suitable for:

  • Laser engraving hobbyists
  • Small workshop users
  • Makers and DIY creators
  • Educational environments
  • Users performing frequent cutting operations

Its primary purpose is to improve engraving and cutting results while protecting equipment and work surfaces.


Key Features and Benefits

Feature 1: High-Strength Steel Construction

What it does

The honeycomb panel is made from high-strength steel.

Why it matters

A stable platform helps keep materials supported during cutting and engraving.

User benefit

  • Better support for workpieces
  • Improved durability
  • Rust-resistant structure
  • Longer service life

The steel structure is also designed for repeated use under regular laser operating conditions.


Feature 2: Fast Heat Dissipation

What it does

The honeycomb structure accelerates heat and smoke release.

Why it matters

Heat buildup can increase burn marks and smoke residue.

User benefit

  • Cleaner cuts
  • Reduced material discoloration
  • Improved engraving appearance

The flat honeycomb hole design allows smoke to escape more efficiently.


Feature 3: Optimized 9 mm Honeycomb Aperture

What it does

The table uses a honeycomb network with a 9 mm aperture size.

Why it matters

Airflow below the material can affect engraving and cutting quality.

User benefit

  • Better smoke removal
  • Improved cutting conditions
  • Cleaner edges on materials

Community feedback from laser users commonly notes that airflow underneath the workpiece can reduce smoke staining and scorching.


Feature 4: Built-In Measurement Scale

What it does

The X-axis and Y-axis include precise scale markings.

Why it matters

Material positioning can affect alignment and repeatability.

User benefit

  • Faster setup
  • Easier material placement
  • Convenient measurements

Feature 5: Surface Protection

What it does

The workbench set includes an aluminum cutting pad.

Why it matters

Laser cutting can damage the work surface beneath materials.

User benefit

  • Protects desks and work areas
  • Reduces accidental damage
  • Improves work safety

The aluminum panel also helps reduce reflections that may affect the laser head.

Compatible Models and Applications

The Longer Honeycomb Working Table is designed for broad compatibility.

Supported laser machine categories include:

  • Diode laser engravers
  • Fiber laser engravers
  • CO2 laser engravers

Compatible machine examples depend on official product specifications.

Supported material examples include:

  • Wood
  • Acrylic
  • Other supported engraving materials

Usage scenarios:

  • Sign making
  • DIY crafts
  • Small business production
  • Educational projects
  • Model making
  • Personalized gifts
  • Batch cutting jobs

Why Users May Need This Product

Many laser users encounter similar issues:

  • Dark burn marks beneath materials
  • Smoke buildup
  • Uneven support
  • Surface damage
  • Reduced workflow efficiency

A honeycomb table may help address these situations.

Improve engraving quality

Better airflow below materials may reduce smoke accumulation.

Improve workflow

Built-in measuring lines can speed up positioning.

Protect work surfaces

The included aluminum panel helps protect the desk area.

Increase efficiency

Users may spend less time cleaning smoke residue.

Reduce common cutting issues

Air circulation can help reduce dark edges and excessive scorching.

Community discussions frequently mention airflow and support as practical advantages of honeycomb beds.


How to Use the Product

The following procedure follows available product information.

Step 1: Place the Honeycomb Working Table

Action

Position the honeycomb board beneath the engraving area.

Why it matters

Correct placement ensures support and airflow.

Expected result

Stable workpiece positioning.


Step 2: Place the Aluminum Cutting Pad

Action

Position the aluminum panel beneath the honeycomb structure.

Why it matters

The panel protects the working surface.

Expected result

Reduced risk of desk damage.


Step 3: Position the Material

Action

Place wood, acrylic, or other supported materials on the honeycomb surface.

Why it matters

Correct positioning improves cutting consistency.

Expected result

Stable material placement.


Step 4: Align Using Scale Lines

Action

Use X-axis and Y-axis markings for positioning.

Why it matters

Improves measurement accuracy.

Expected result

Faster setup and alignment.


Step 5: Start Engraving or Cutting

Action

Begin the laser job according to machine instructions.

Why it matters

Airflow beneath the material assists smoke release.

Expected result

Cleaner cutting and engraving results.


Common Questions or Issues

Question/Issue Explanation Recommendation
Dark marks under wood Smoke accumulation beneath material Improve ventilation and use honeycomb airflow
Uneven material support Material may shift or bend Ensure material sits flat
Desk damage concerns Laser energy can affect surfaces Use included aluminum cutting pad
Material alignment difficulties Incorrect positioning Use X/Y scale markings
Unsure about compatibility Machine dimensions vary Follow official product specifications

Tips for Better Results

  • Keep the honeycomb surface clean
  • Remove accumulated debris regularly
  • Use proper ventilation during engraving
  • Position materials flat against the work area
  • Check machine focus before starting
  • Use suitable cutting parameters for each material
  • Verify machine compatibility before installation

Frequently Asked Questions

1. Is this compatible with all laser engravers?

The Longer Honeycomb Working Table is compatible with various diode, fiber, and CO2 laser engravers. Follow official product specifications for exact compatibility.


2. Does this improve engraving quality?

It can improve airflow and smoke removal, which may help produce cleaner cutting results and reduce smoke discoloration.


3. Do I need additional accessories?

The package includes:

  • Honeycomb board ×1
  • Aluminum cutting pad ×1

Additional accessories depend on user requirements.


4. How often should it be replaced?

Replacement frequency depends on usage intensity and maintenance.


5. Can beginners use it?

Yes. The accessory is straightforward to set up and use.

6. What are the product specifications?

Product specifications:

  • Material: High-strength steel
  • Product size: 300 × 200 × 22 mm
  • Diameter of honeycomb network: 9 mm
  • Cutting pad: 295 × 195 × 0.5 mm
  • Gross weight: 1 kg
  • Package size: 335 × 245 × 40 mm

7. Does it help reduce smoke marks?

The honeycomb design allows smoke to escape more effectively during operation, which may reduce smoke-related discoloration.


Final Thoughts

The Longer Honeycomb Working Table is designed to solve several common laser engraving challenges: smoke buildup, surface protection, and material support.

Users who frequently cut wood, acrylic, or similar materials may benefit from improved airflow and cleaner edges. The included aluminum cutting pad adds protection for work surfaces, while the built-in measurement markings help improve workflow efficiency.

Before purchasing or installation, always confirm machine compatibility and follow official product specifications.


By Software | April 19, 2023
Longer Laser Rotary Roller - LONGER
Longer Laser Rotary Roller

Longer Laser Rotary Roller is a fundamental accessory for all those who carry out laser engraving work, as it is possible to make engravings on curved surfaces with ease, which would be impossible to perform without this accessory.

Everyone who uses a laser engraving machine knows well that in order for the laser to engrave a surface it is necessary that the laser beam is focused. Assuming that, in order for the laser beam to be in focus it is necessary that the distance between the laser module and the surface to be engraved is 50mm, once the right distance has been established it is possible to engrave any point of the surface as the equidistance is respected at every point. However, if the surface to be engraved is not flat but curved, then the equidistance is not respected; in fact, as you can see from the image below, the focus (fixed in point A) is lost as soon as the laser module moves with respect to the focus point.

To solverand this problem it is necessary to use the Longer Laser Rotary Roller, which causes the surface to be engraved (through a rotation) to move instead of the laser module. In this way, each point of the curved surface to be engraved is brought to the focus point of the laser, i.e. the surface to be engraved makes a "rotation". For this technique to work correctly it is necessary that the surface to be engraved is cylindrical in shape, otherwise the problem of focusing would be solved with respect to the Y axis with the Rotary Roller, but it would occur with respect to the X axis.

The installation of Longer Rotary Roller is really easy: just connect it to the Y-axis connector of your Longer Ray5, and in this way the laser module will move to the X axis, but the movement with respect to the Y axis will be applied to the Rotary Roller instead of the Y axis of the laser module. As for the settings, they are almost the same settings used for engraving on a flat surface. In fact, if you want to engrave a 10x10cm image, instead of getting a 10x10cm image on a flat surface you will get a 10x10cm engraving on a curved surface, so the result in terms of size does not change. To better understand this concept, it is similar to when you remove the label from a jar: the label on the jar is curved, when you remove it and place it on a plane it becomes flat, but in both cases the label is always the same and the dimensions do not change.

In order for the movement steps to be respected, the Rotary Roller must be set differently according to the size of the object on which you intend to make the laser engraving. In detail, about the gear of the roller, you can refer to these dimensions in order to keep the correct steps:

1: Distance between two axes is 5mm, suitable for engraving 6-38mm diameter objects

2: Distance between two axes is 23mm, suitable for engraving 38-70mm diameter objects

3: Distance between two axes is 41mm, suitable for engraving 70-102mm diameter objects

4: Distance between two axes is 59mm, suitable for engraving 102-134mm diameter objects

5: Distance between two axes is 77mm, suitable for engraving 134-166mm diameter objects

6: Distance between two axes is 95mm, suitable for engraving 166-200mm diameter objects

Using the Longer Laser Rotary Roller allows you to expand the functionality of your Longer Ray5, as you can easily engrave many everyday objects, such as pens, jars, cylindrical objects and much more.

https://eu.longer.net/collections/laser-engraver-accessories

By Software | April 7, 2023